So I’m back with a few updates about what I’ve been up to this summer…
First, I’ve been making things! I started by playing with Squishy Circuits…
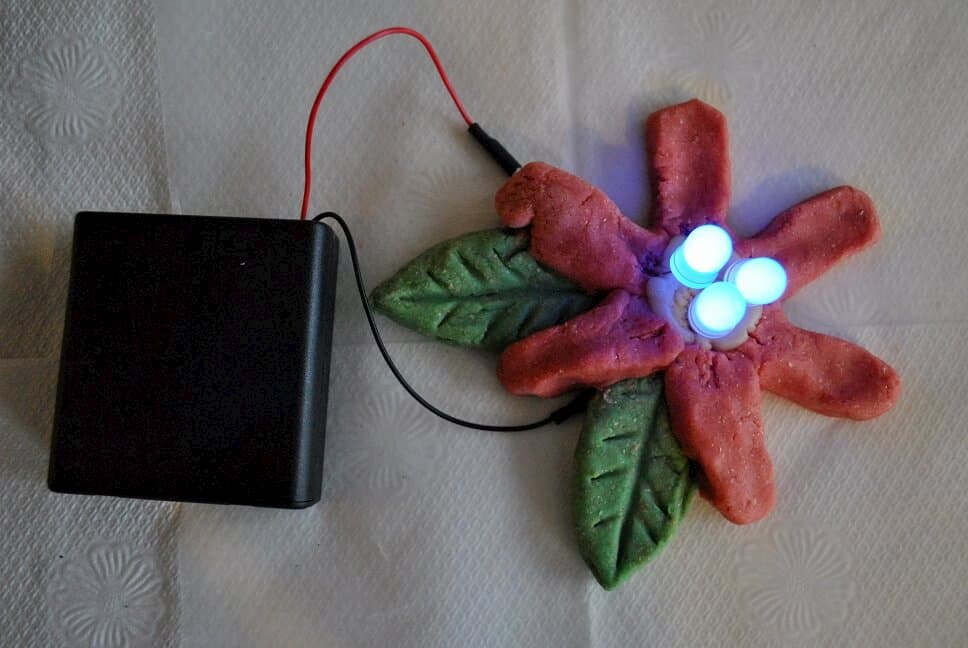

I learned a bit about LED lights and re-learned some electricity principles that I used to know in 4th or 5th grade. I also learned that nieces and nephews love “making a party” out of the components and 2 chunks of salt dough.
My most exciting project, however, has been an interactive nursery rhyme book with LED lights, a beeping buzzer, and a vibration motor. For instance, Jack jumps over a lit candlestick, and the mouse runs up a clock that beeps.
It started as an idea to help teachers, librarians, and students learn about electronics. When I read Jie Qi’s tutorials on paper circuits and Librarian in the Middle’s blog post about 21st Century Notebooking, my brain just caught fire! What do librarians love more than stories, especially classics?
And while I don’t think nursery rhymes and old stories “need” interactivity or bells and whistles to be interesting to children today, I do think that making 3 bags of wool light up as you count them with a child is fun to read and sing.
The “Twinkle” circuit above is by far the most advanced paper circuit (or any circuit) I’ve ever made. I learned that micro-controllers are SWEET, even when I don’t know how to write Arduino code.
I learned that 1 coin battery isn’t enough power to light 8 LEDs. I learned that red LEDs are so power-greedy that they put out any other LED in the same circuit…and I still don’t know why that is.
I learned that there is only ONE piezo buzzer on the market that will beep without programming a micro-controller…after trying all of them.
And like Librarian in the Middle, I learned that everything takes WAY longer than you think it will when you are “making.” I thought creating 7 interactive nursery rhyme pages would take a couple of weeks at most, not all summer long.
Still, I had a blast, and I experienced that incredible feeling of being joyfully consumed by a project I cared about. My learning process was right on my “instructional level” to use the pedagogical term — not so easy that I got bored, but not so hard that I ever wanted to give up. Even when I was sick of working on a page or frustrated by a particular aspect, my desire to create the finished project for myself and to share with my family kept me motivated.
I’m still pondering how I can transfer this knowledge and my experiences to my work in a library on a “flixed” schedule (part fixed classes, part flexibly scheduled collaborative time).
I love this, and I love your process. I want to see a labeled diagram of that Twinkle page–it looks amazing! What kind of microcontroller did you use? I am feeling inspired and like I want to take a break from making stuffed bears and go back to paper circuits for my last week of summer!
Oh yeah, I have that issue with blue LEDs sometimes as well–they want to suck all the power. I think using resistors must be a way to eliminate this problem, but I haven’t had the energy yet to calculate which kind of resistor each LED would need and then add them. Easier to just slap the LEDs on there and hope for the best! 🙂 The circuit stickers from chibitronics have built in resistors, and so the colors play together nicely, at least so far in my experience.
I really looked at Circuit Stickers, but they are just so expensive for a surface-mounted LED. I think they’re great for someone who isn’t interested in the electronics, but is more into the art side of things. As you can see from the commercial clipart by Little Red’s Treehouse, that isn’t me. 🙂
I used a LilyTwinkle like you did with your iPad case project. I don’t know any code languages, so I needed the pre-programmed microcontroller. If you e-mail me, I’ll send you the Twinkle pages. I think I need to sleep though…it’s getting late.
I just use the circuit stickers when I’m combining different colors that don’t play well together on one circuit–I agree they are expensive, so I pretty much save them for when I need them! I’ll teach kids to use the surface mount ones first, then pull out the stickers when needed so that they will last a while.
Which piezo works without a microcontroller? I thought you must be using an ATtiny85 because you mentioned a buzzer, but now I see you didn’t use a microcontroller for that part. I can see the Twinkle page well enough above–now that I know it’s a LilyTwinkle, I can figure it out! 🙂 I’m going to attempt to program an ATtiny for a paper circuit–I am just waiting for a part to come in the mail that I need for uploading the code to the ATtiny.
Good idea about making the circuit stickers last and starting off with surface-mount LEDs as students are learning. I think I’m going to have to buy a good amount of copper tape. 🙂
There’s one piezo by Adafruit that’s called “breadboard friendly.” That’s the one that works on a simple circuit, no microcontroller necessary. Sometime I’d like to learn how to program in Arduino and make the piezo play a grandfather clock chime on a plain piezo for “Hickory, Dickory Dock,” but for beginners, that seems like asking too much.
I’ve gotten in the habit of cutting the copper tape in half (lengthwise), which works just as well and makes the tape last longer.
There is a ton of arduino code out on the web that you can easily copy and load to a project–I can’t write arduino yet, but it’s easy to copy/paste and then figure out where to tweak. That said, I have no idea how to program it to play a song! 🙂 One of my students made an arduino keyboard this year; maybe he could do it. 🙂